By Ken Myers July 18, 2025 IMPORTANT UPDADATE REGARDING the CHOICE OF ANDROID DEVICE for use with the Blunami App for Android! September 9, 2025 Introduction & Selecting the Locomotive The following information is presented in chronological order. The information is based on the notes that I made while converting an Athearn HO RTR RS-3 w/DCC & Sound, CPR #8451 (ATH28771) to Dead Rail operation. I previously completed three Dead Rail/Battery on Board conversions using the LocoFiTM decoder. I am very satisfied with the conversions and the LocoFiTM decoder and the functioning of the FREE LocoFiTM App for Android devices that uses WiFi for the connection between the Android device and the decoder. Soundtraxx released its new Blunami Wireless Decoder in early August of 2022, which was about the same time that I was reentering HO scale train modeling and started investigating Dead Rail. (See my Website, "A Journey Into HO Scale Model Railroading in the 21st Century".) The Blunami decoder uses Bluetooth Low Energy to communicate between their FREE App and the Blunami decoder. At first the App was only available for iOS devices, but it was later ported to the Android operating system. Once the Android version of the Blunami App became available, I became more intersted in using Blunami. It was put on the back burner for a long time, since LocoFiTM Dead Rail conversions were working out so well. Near the middle of July, 2025, I felt that the time was right. I wanted to do a conversion that would be super simple. I looked for a locomotive that already had a Soundtraxx Tsunami 2 decoder and sound in it, but I did not want to spend an arm and a leg for it. I did a Google Search for DCC with sound locomotives and the Athearn RS-3 came up for $139.95 at Train World. I knew that couldn't possibly be correct. 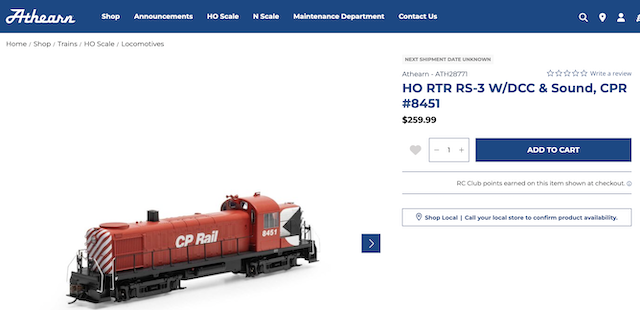
Screen Capture from the Athearn Website, July 30, 2025 I checked, double checked and found out that it was indeeded the $259.99 list price locomotive for $139.99. With Tsunami 2 and sound, it was exactly what I was looking for, so I grabbed it. 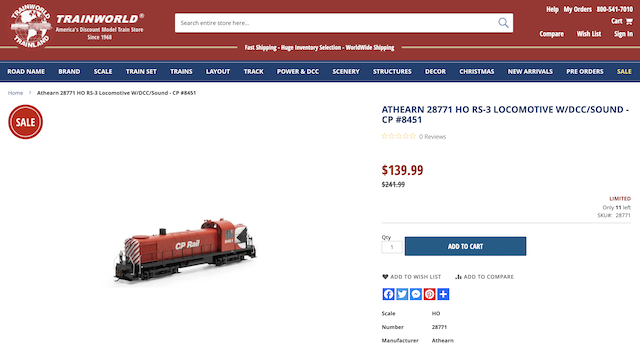
Screen capture from Train World Website, July 30, 2025 July 18, 2025 Ordered the following items: Athearn 28771 HO RS-3 Locomotive W/DCC/Sound - CP #8451 $139.99
Weight of the Locomotive out of the box and with new decoder: 291.9g or 10.3 oz. Walthers #931-1673 Trainline 50' Plug-Door Boxcar - Canadian Pacific $21.99
Train World total: 161.98
Amazon Orders
Amazon Total: $29.98
July 19, 2025
Went to NMRA 2025 Convention Train Show at Suburban Showplace in Novi, MI, at 10:45 and back home at 12:45.
The Amazon order of the 6 in a package of Henreepow LiFePO4 batteries and 2 AA 4 battery battery holders arrived. July 22, 2025 I realized that I made a mistake in ordering the 6 pack of Henreepow AA (14500) 3.2V 600mAh LiFePO4 batteries. I'll never be running more than two locomotives at a time, so my 8 Henreepow 14500 size LiFePO4 batteries were all that I needed. I had already found that they seemed consistent. I should have ordered a different brand of 14500 (AA size) LiFePO4 batteries to test them. That would have advanced my knowledge of these types of batteries that are available from Amazon.
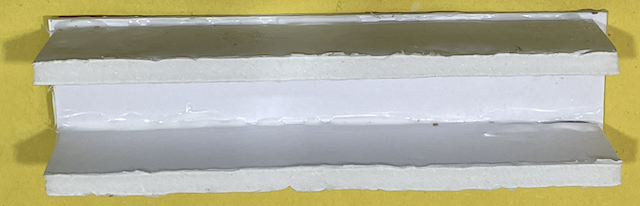
I opened the DGZZI 2-Pack 4 x AA Battery Holder with Snap Connector and snapped a supplied connector, with red and black leads, onto the battery box. The connector appeared to be of the typical 9V type used to connect alkaline 9V batteries. I chose to use the supplied connector, with its wires, for the battery box this time, even though it does add more resistance to the circuit. On my previous installations, the leads from the locomotive were just soldered to the connectors on the battery box. Unfortunately, the leads kept breaking off at the connector when the battery box was handled. On this installation, the wires, from the locomotive, are now spliced and soldered to the wires from the 9V battery connector. While I could have used the battery box holder from the other 50' boxcar, I made a new one for the Walthers #931-1673 Canadian Pacific, Trainline 50', Plug-Door Boxcar.
The battery box holder sides are foam board and the bottom is a piece of backing board. It is glued together using Aleene's Tacky Glue. The battery box holder is used to hold the battery pack vertically in the boxcar battery car. July 23, 2025 I had previously watched many Soundtraxx Blunami videos and I thought that I had seen scale speed displayed on the device running the App, a feature that LocoFiTM has. I was WRONG! A Google search this morning for "can Soundtraxx Blunami display scale mph speed" resulted in the AI answer containing this; "In short, while you can carefully adjust the speed characteristics of your Blunami-equipped locomotive to mimic realistic scale speeds, the Blunami app itself does not natively display the locomotive's speed in scale MPH." Click here to view the complete AI response in a new tab. I did note that the Appss display DOES indicate the voltage. That can be very useful when running Dead Rail. Since the battery is running down through the run, is it important to set the maximum speed? If I do want to set maximum speed, I could use a timer and the distance of the outside loop, which is 27 feet 9 inches.
How long does it take, at 65 mph, to travel 0.4572443 miles? (0.46 was used in an online mph to distance calculator to get the answer.) The answer was 25 seconds. (This ended up being the actual way that I did set the maximum speed.) I could also run two locos at the same time and match the Blunami to the LocoFi version. That raised the question; since each loco actually starts to move at a different speed step, LocoFi has an easy way to make that the bottom of the throttle display the "zero" point. How does Blunami handle the start up point speed step? A Google search for "how is the zero speed step set in blunami" noted this;
It was interesting to note that when I used the same phrase in the Google Search, I got different answers on different days. Click here to view the response, in a new tab, that I originally got. I opened The Installation-Guide.pdf, on my computer, in my Blunami Manuals folder. I read to the point where it said, "Carefully read the instructions that are printed on the decoder's packaging." The instructions on the packaging were read without removing the staples. The most significant note on the package was "1A Motor Stall Current". In the guide it said, "Note: Be sure that your speaker is rated to match the audio amplifier of your decoder; failure to do so could cause damage to your speaker. Check the packaging and our website for ratings for each decoder format." There was no watt rating on the packaging. The Soundtraxx Website for the BLU-21PNEM8 was checked and I found "Audio Amplifier: 2 Watt, 8-Ohm Load". Since I was swapping a similar Soundtraxx decoder, I did not do the stall current test and assumed the speaker was okay to use. I skipped the "Steam Locomotive Considerations". "Step 3. Isolate Motor and Lights from the Frame Note: If you have a DCC-ready model with an NMRA 8-pin connector, NMRA 9-Pin "JST" connector, NEXT18 connector, or 21-Pin "NEM" connector, proceed to page 15." I skipped to page 15 as the Athearn RS-3 has a 21-pin "NEM" connector. Page 15 has only brief info on the 21-Pin NEM Connector Interface decoder and shows the 21-Pin NEM Wiring Diagram. It also notes, "Please refer to page 24 for more information about this interface and SoundTraxx 21-Pin NEM decoders." I went to page 24. There was no information on the SoundTraxx 21-Pin NEM decoder on page 24. I found it on page 26. I found the information unclear in some areas and I didn't understand the information regarding the speaker wires. This was the last thing noted in the Installation Guide. I opened ALCOSoundSelections.pdf from my Blunami Manuals folder on my computer. It appears that the defaults are in blue in the chart. It looked like I needed to change the prime mover to a 244 Turbo. I opened blu_diesel_technical.pdf from my Blunami Manuals folder on my computer. 139 pages of CV information. I did not see how that applied to Blunami. I opened blu_diesel_usersguide.pdf from my Blunami Manuals folder on my computer.
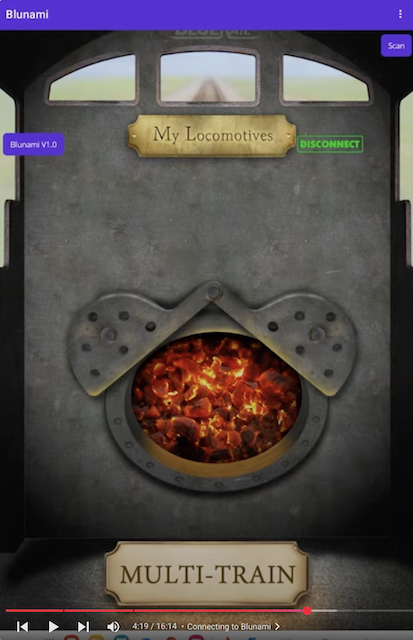
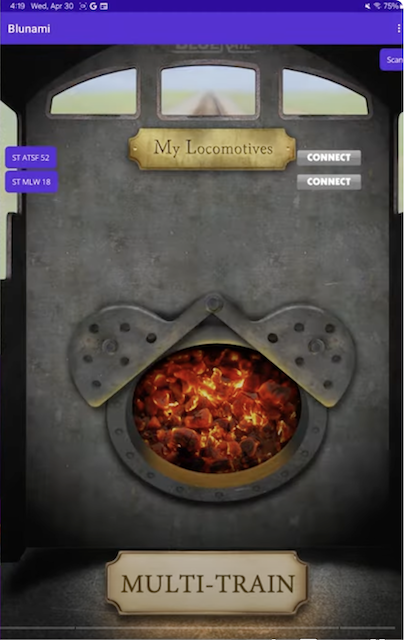
The Soundtraxx Decoder Selector page was opened and it does not have the version of the Athearn ALCO RS-3 I ordered on it. I opened the YouTube Blunami playlist. I found "Close Your Apps to Ensure a Smooth and Easy Connection Next Time" the most interesting and useful. It does not appear that the Blunami App has a close or exit "button" like the LocoFiTM App. It must be closed manually on the device to keep it from running in the background and to close its cache. I opened the Soundtraxx Diesel Sound Samples page for the ALCO sounds; I thought that this might be useful for selecting the horn and bell. The TrainWorld order for the loco and boxcar arrived between 2:30 and 3:30 today. I took a quick look at the loco and boxcar. I could not figure out how to open the engine's clamshell. I had to go to Google to find out, as there was no indication on the box the locomotive came in. I found the video, "How to remove and install your Athearn locomotive in the factory box". That video showed me how to do it. I removed the RS-3 from its clamshell and took a quick look at it and the boxcar. July 24, 2025 I rewatched the Soundtraxx video on YouTube; "Getting Started with Blunami: Your Wireless Model Train Upgrade!". Click here to view my notes in a new tab. VERY IMPORTANT NOTE ABOUT THE ABOVE, LINKED SOUNDTRAXX VIDEO! If George had produced this video using the bluish button with "Blunami v1.0" on it to connect to the decoder, I would have thought that I had a bad App or bad decoder! Luckily for me, he pressed the MULTI-TRAIN button.
I successfully opened the Android version of the Blunami App, on the Samsung Galaxy S7 Edge, by using the MULTI-TRAIN button. Later, after restarting the App, whenever I pressed the bluish button with Blunami v1.0 on it, the program crashed on my old Samsung Galaxy Edge S7. If the bluish button with Blunami v1.0 on it had been used during the video, I would have thought that I had a bad decoder or App because the program crashed every time I pushed that button. I probably never would have tried the MULTI-TRAIN button. Why the Android App, on my old Galaxy Edge S7, might be crashing is explained later. The good news is that the version of the Android App, that I have, works for me when the MULTI-TRAIN button is used. Next, I took a lot of notes while watching the video. Later, I wanted to find the answer to, "Did the Canadian Pacific run its RS-3 long hood forward?" to determine which end to add the battery car to. Google Search: Did the Canadian Pacific run its RS3 long hood forward?
Can motors are typically timed so that the rear of the motor, where the wires attach, determines the rear of the locomotive, so that the timing is advanced, not retarded. That is why I wanted to know which hood forward for the Canadian Pacific. I liked the flux dispenser used by George Bogatiuk of Soundtraxx in his soldering video.
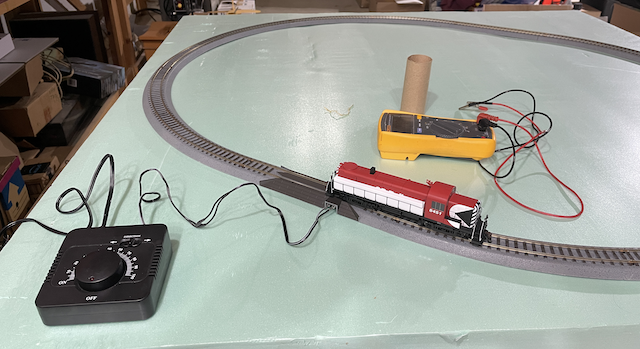
The locomotive was given another quick once over and appeared to be in good condition. There was an accessory pack in the locomotive packaging that contained 3 very small parts. The accessory pack was set aside in the locomotive clam shell. A loop of track was set up to test the supplied Soundtraxx Tsunami 2 in the locomotive. With the transformer OFF, the track still showed a very minimum amount of voltage on the Multi-meter voltmeter screen. With the throttle full open, it took a long time to reach a somewhat stable voltage of 15.7V. The following photo is actually an active link to a short video, on my Facebook page.
 Tsunami 2 decoder test The factory installed Tsunami 2 decoder appeared to be working. The locomotive coupler height was checked with a Kadee height gauge. The short hood end coupler height was almost perfect, but the long hood end had a bit of a droop, but it worked okay. A NMRA gauge was used to check the wheel gauging, which was within spec, but there appears to be a lot of horizontal play in the axles. I tried the Athearn supplied couplers on the locomotive with a boxcar, from my already in use cars, as it was already set up correctly with Kadee couplers. The supplied coupler would hook up fine, but they would not release the boxcar over the magnetic Kadee uncoupler. Four of my Henreepow Life batteries, my numbers #5, #6, #7, and #8, were put on charge to be used after the decoder exchange. The transformer to track wire was removed from the transformer to be used as the leads to the track, once the decoder was changed to the Blunami decoder. I noted that the wire with the white line in that lead to the track is positive. I used the Soundtraxx YouTube video, "Step-by-Step Tsunami2 TSU-2200 decoder install in an Athearn RTR RS3" as a guide to remove the shell. The shell was removed from the chassis to install the Blunami decoder. The couplers and two screws near the bottom of the short hood trucks were removed. The shell was lifted off. As careful as I was removing the shell, I broke the antenna off the top of the cab. I was surprised to see only one speaker! 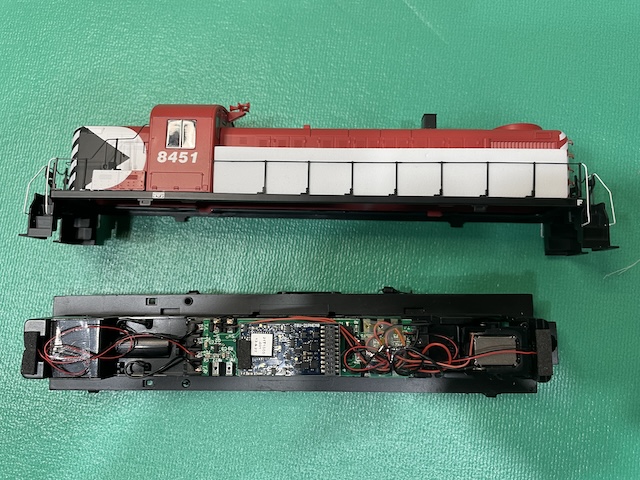 The original Tsunami 2 is in place and the single speaker is clearly visible. 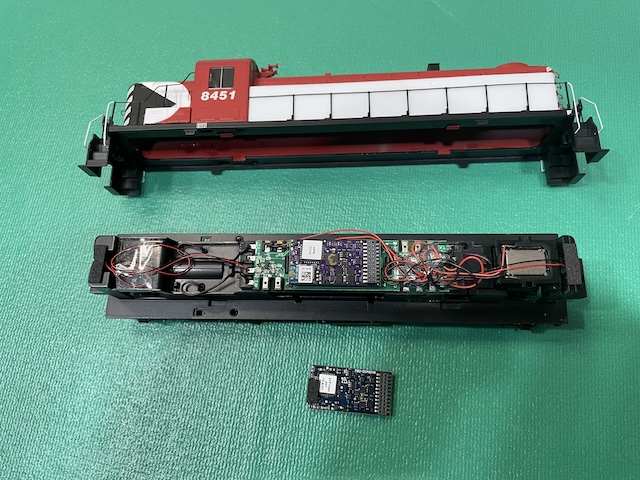 The Blunami was installed and Tsunami 2 set aside. The shell was not put back on for the initial testing on the loop of track using a 4S Henreepow LiFePO4 battery pack connected to the track for power. I connected the locomotive to the App and ran it a little in forward and reverse and did the first part of setup; nickname, DCC #8451. One headlight seemed to be not working when the direction changed. I noted that the locomotive ran WAY TOO FAST! I couldn't remember how to shut down the App. I rewatched "Close Your Apps to Ensure a Smooth and Easy Connection Next Time". That didn't help as my Galaxy 7 Android phone is too old. A Google Search found, "Samsung Galaxy S7: How to Close Apps". I found out that I needed to press the left button in the silver band at the bottom of the phone. It opens the recently used apps. To close the running App, I can swipe the App left or right to close it, but sometimes there is a X in a circle that can be used to close it. I had to watch the Soundtraxx YouTube video again to determine which wires go from the track to the decoder, "Step-by-Step Tsunami2 TSU-2200 decoder install in an Athearn RTR RS3" as a guide to remove the shell. Unfortunately, that did not help, but I explored the trucks and noticed that the power from the trucks comes from both sides with black wires to the Athearn board on each end. Interesting! Even though I had gotten started, I opened the "Blunami_Quick_Start_Guide.pdf". Page 7 noted that I did NOT have to select MULTI-TRAIN, which I did, but that the single bluish button, with "Blunami v1.0" on it, should work. When I tried to do that, the App kept crashing, but when the "MULTI-TRAIN button" was used, the App would work and not crash. The lights were fine. I just needed to turn them on in the Android App. The decoder powered up even though I chose Manual Start Up earlier. I looked into that later. I watched Diesel Start-Up & Shutdown with the Blunami App
I watched Speed Settings (Max Speed) with Blunami
The prime mover was changed to the 244 turbo. I looked into the problem of the Samsung Galaxy S7 Edge crashing when the "Single Locomotive Button" was chosen and not when the "MULTI-TRAIN" option was chosen. In the Blunami Quick Start Guide, page 5, it notes, "Note: The device should have a minimum score of "500" on the "single core" score at GeekBench. If the device is not in the list, download the "GeekBench 6" app and it will tell you the device's score." I went to the GeekBench site and found that the Samsung Galaxy S7 Edge used an ARMv8 1586 MHz (8 cores). The Single-Core Score was 412 and Multi-Core Score was 1178. "Interesting!" I cannot explain why my old Samsung Galaxy S7 Edge DOES appear to work with the App when the "MULTI-TRAIN button" is chosen, but it does! I viewed F14 Switching Mode with Tsunami2 and Blunami Decoders. It is called Switcher Mode in the function (FCN) menu. 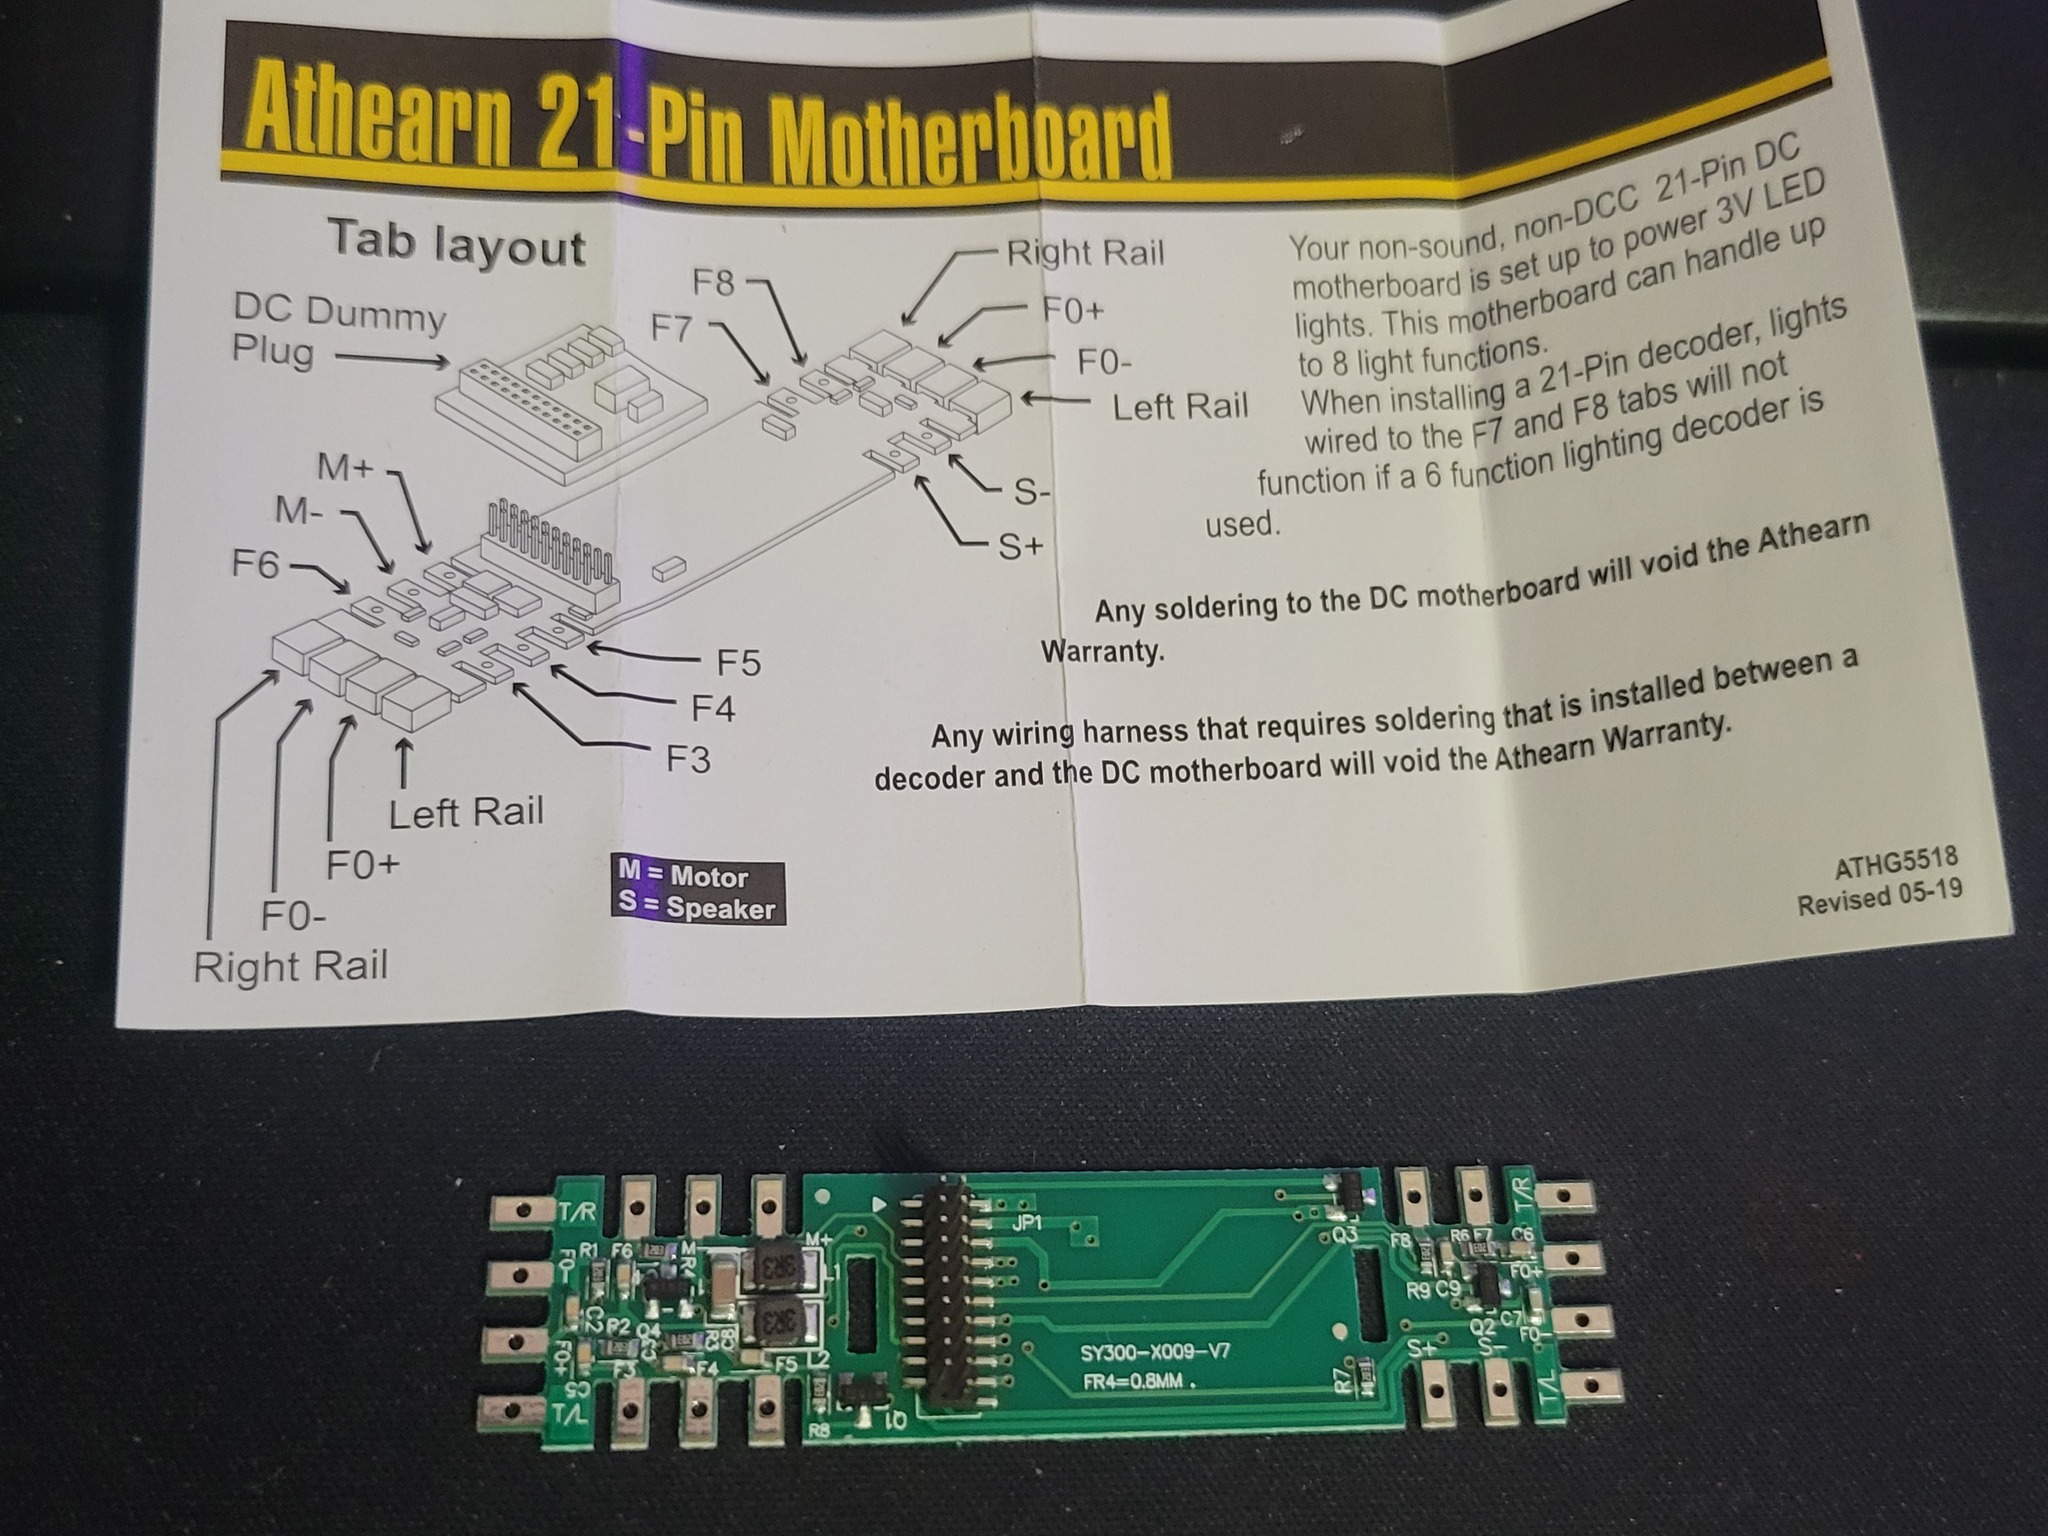 I found the Athearn 21-Pin Motherboard layout on Facebook. This diagram was helpful for the battery leads for dead rail. July 25, 2025
Battery information was gathered and a photo and short video clip was made. The resting voltage of battery #8, from the 4S LiFePO4 pack was 3.332V. That suggested a pack voltage of around 13.33V. The pack voltage, measured using the track rails was 13.33V, as expected. 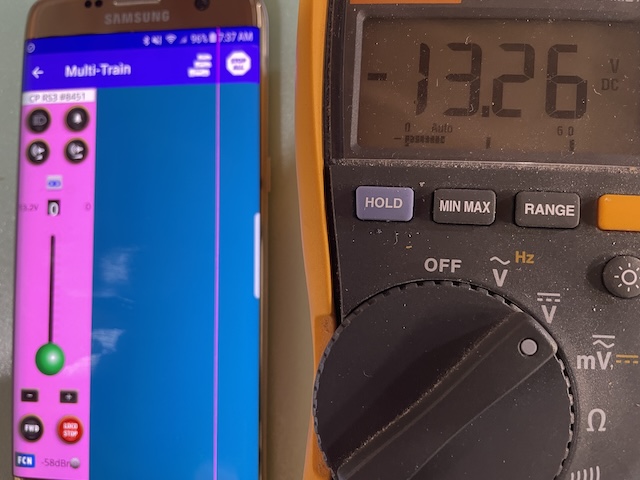 With the locomotive on the track at idle, the multimeter shows 13.26V and Blunami App 13.2V. The voltage drop was caused by the Blunami decoder at idle. The following photo is actually an active link to a short video, on my Facebook page.
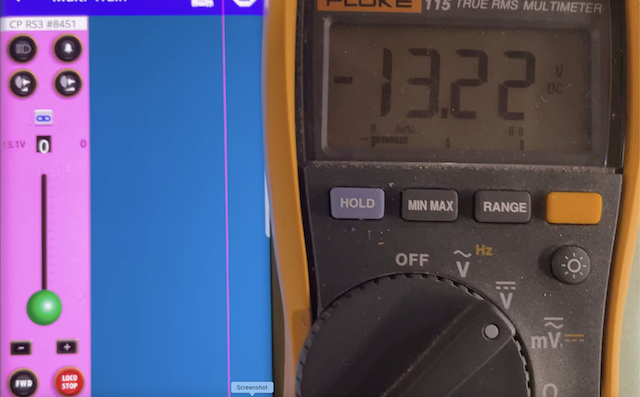 Voltage Comparisons The video clip shows the voltage when going up from idle just a bit and then back to idle. This demonstrates that the voltage displayed by the App is much lower than the multimeter connected to the track rails. This indicates that to check the battery pack voltage, the locomotive needs to be at idle. The following video clip shows the chassis running the loop of track used for testing and App setup. The 4S Henreepow LiFePO4 600mAh battery pack is seen connected to the loop for testing and set up of the Blunami and its App. The following photo is actually an active link to a short video, on my Facebook page.
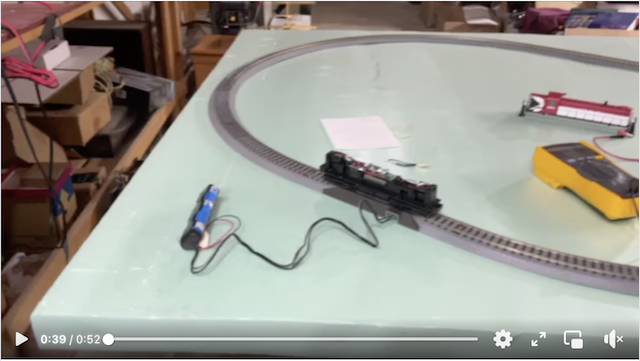 Chassis Running The following photo is actually an active link to a short video, on my Facebook page.
 Initial Dead Rail Test The video shows the initial Dead Rail test using the battery car. The locomotive shell was modified slightly to allow the wires to go to the battery car by running to the right of the rear coupler tab, when viewed from the top. A hole was made in the back of the step area to run the wires out of the locomotive to the trailing battery car. 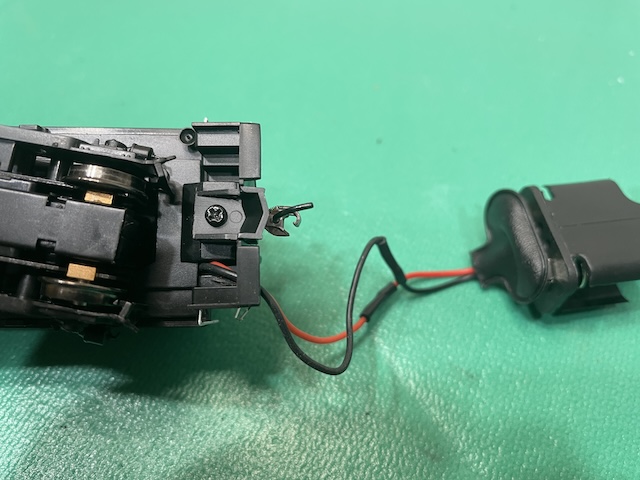
The wires coming out of the chassis, as seen from the bottom. The shell was placed back on the chassis and the rear coupler and its screw put into place. 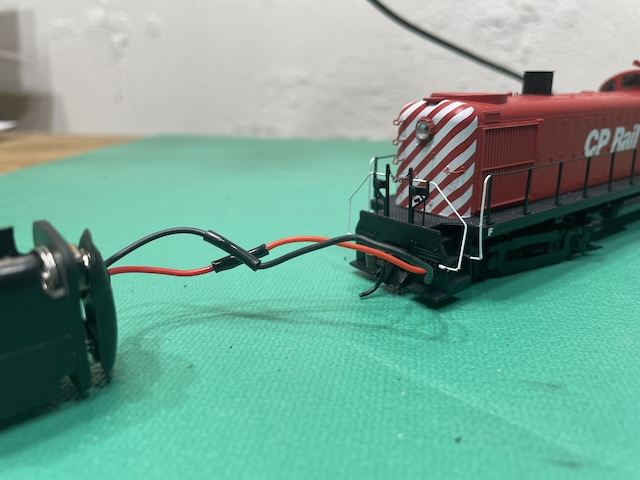
The wires passing out the back of the locomotive and to the battery pack that is placed in the battery car. The trailing battery car boxcar frame was modified to allow the wires, that come in from the locomotive, to enter the battery boxcar. The frame of the boxcar was modified to allow the box part of the boxcar to slip on and off easily. The locomotive front coupler and boxcar rear coupler were changed out for Kadee #148s. Their height and uncoupling action over a Kadee magnet were checked and found to be okay. The trucks on the boxcar presented a problem when installing the Kadee coupler. The trucks are not screwed on. They use a pop-in pin going through the frame and into the truck. It took a bit of trial and error to learn this. This method of truck attachment is not very steady and allows the car to "roll" to one side or the other when the battery is placed on the frame, causing a noticeable tilt. The boxcar, with the supplied weight removed, was weighed with the battery box holder, battery box and 4 Henreepow 600mAh LiFePO4 14500 batteries. The total weight of the boxcar/battery car was 156.3g or 5.5 oz. The wires from the locomotive and battery box were soldered together. The locomotive and battery car were run on the loop without the box being on the boxcar. It all went well. The box was fitted to the boxcar/battery car and the whole unit run on the loop for my granddaughter and wife. The unit was run on the loop with another boxcar added and a caboose. This made up a very short train. The locomotive and battery car were moved to the layout. 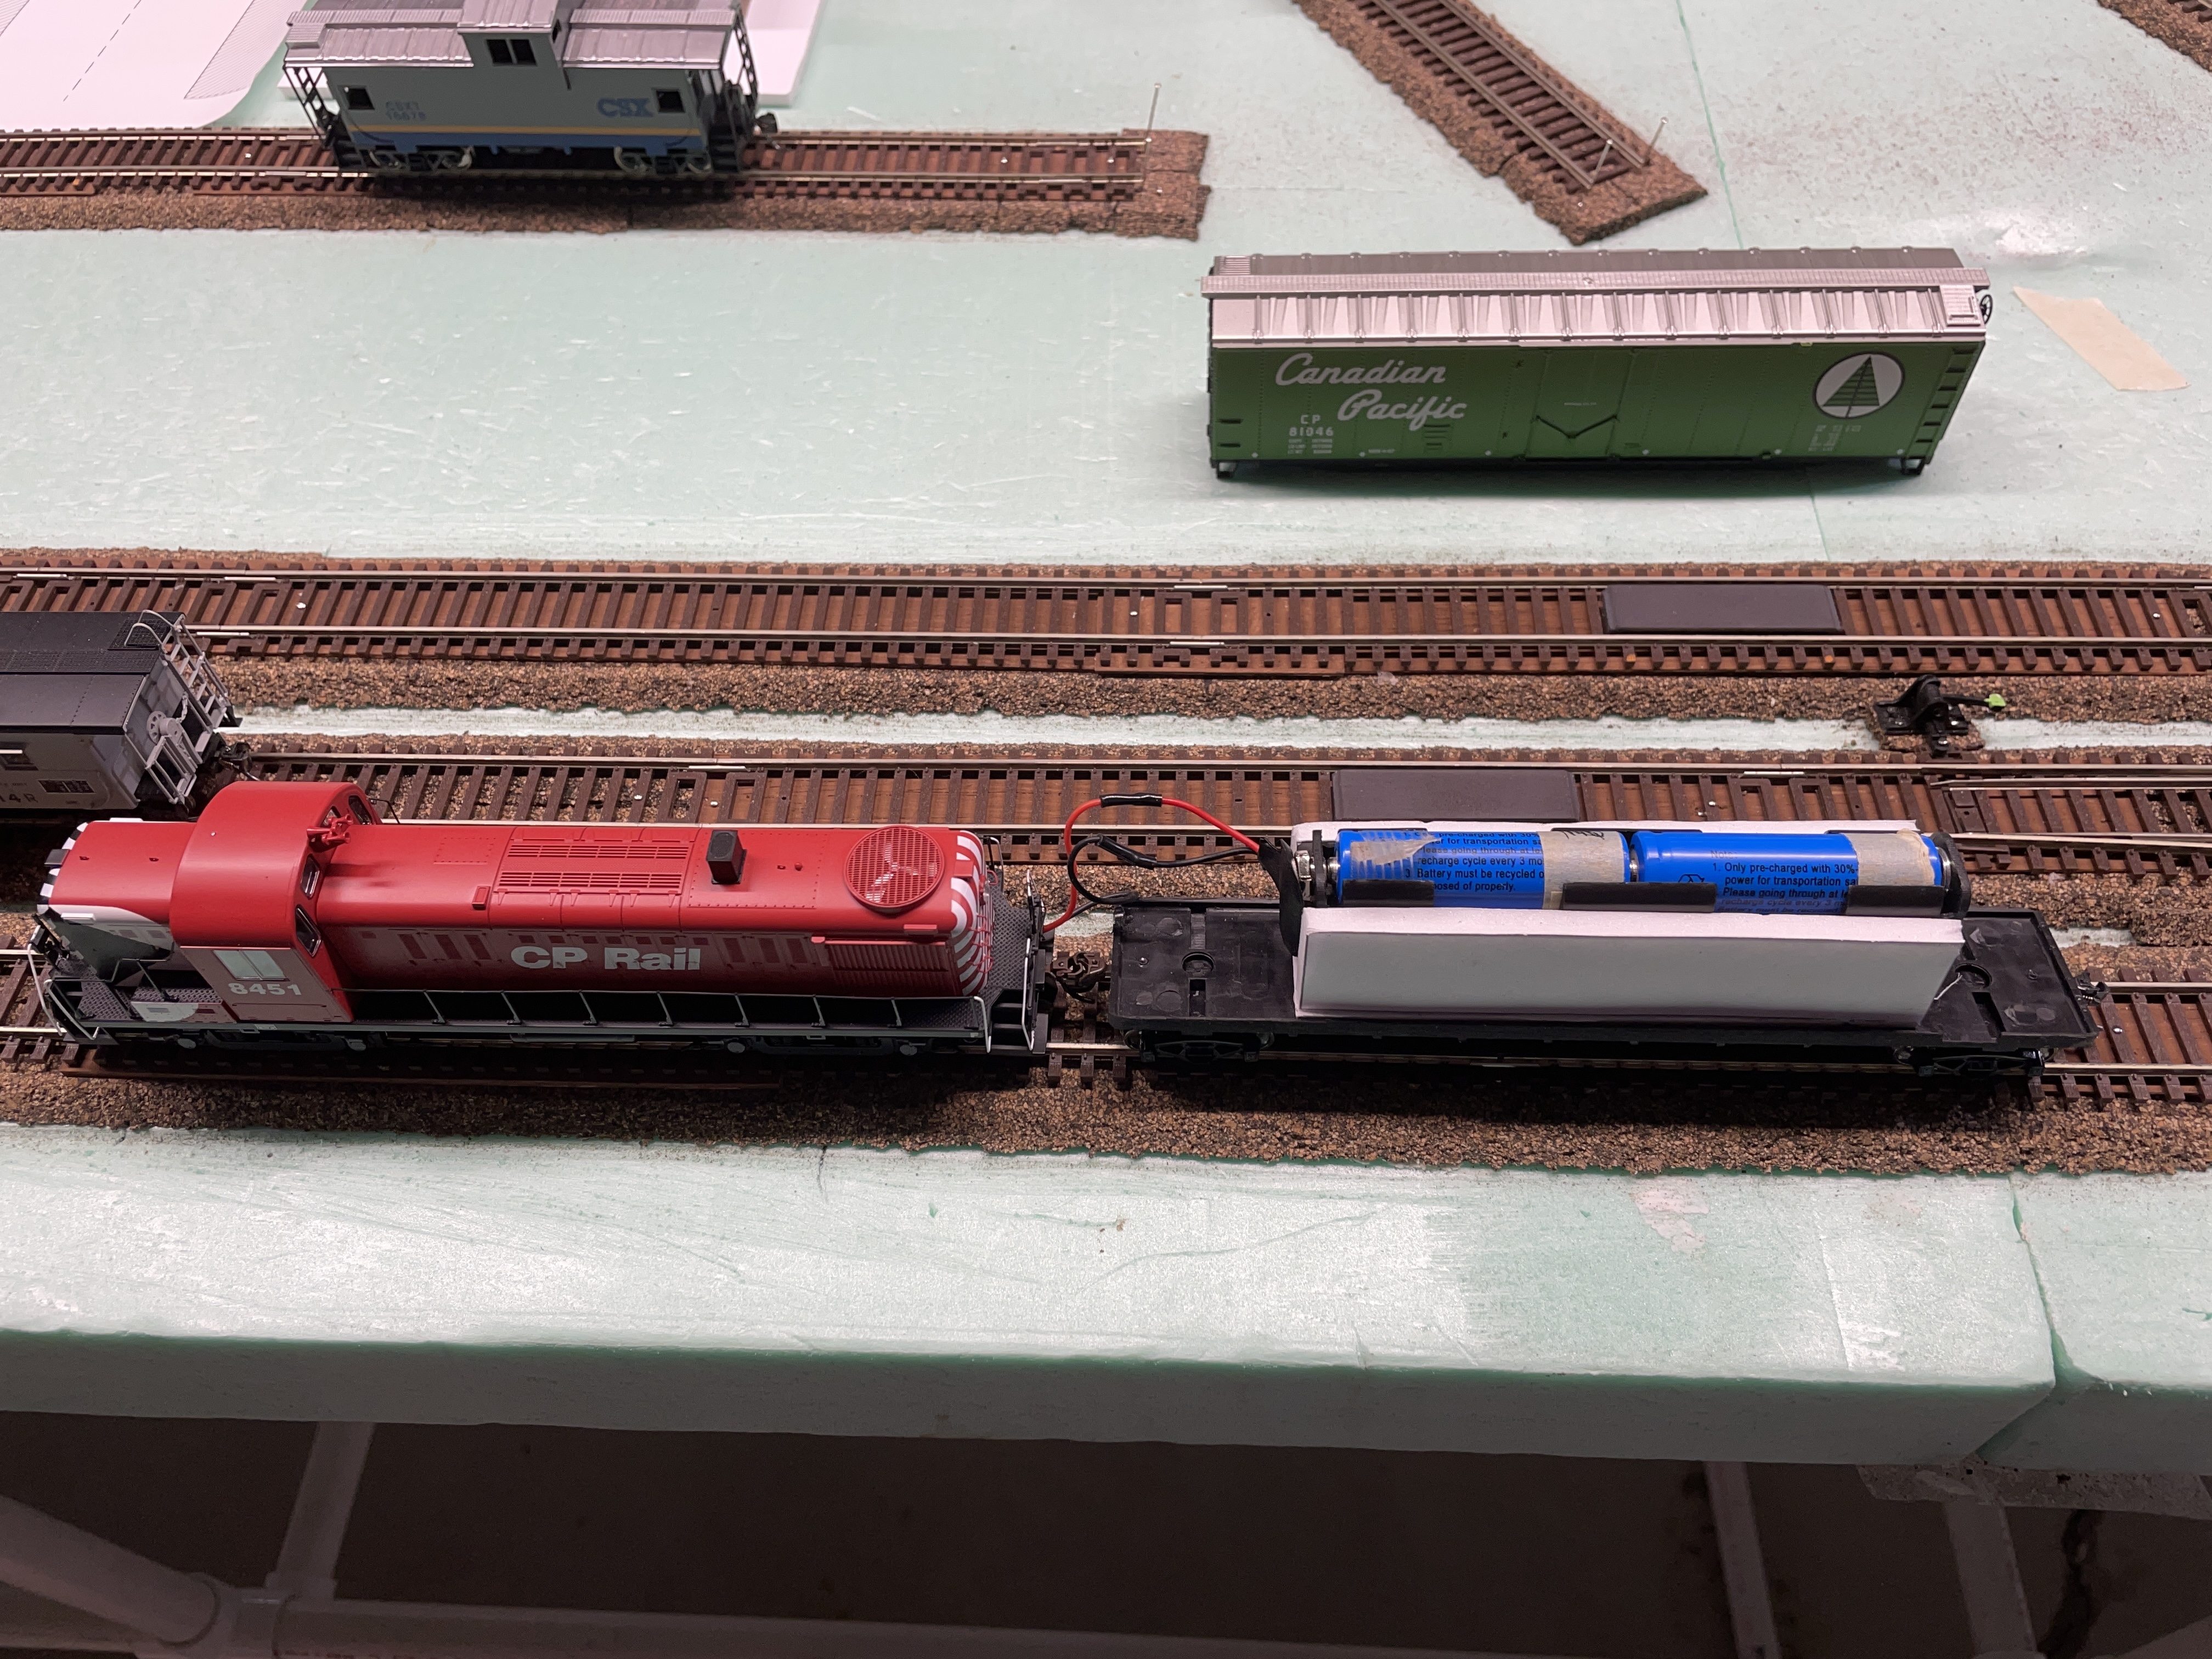 A photo was taken with the box off the boxcar. The following photo is actually an active link to a short video, on my Facebook page.
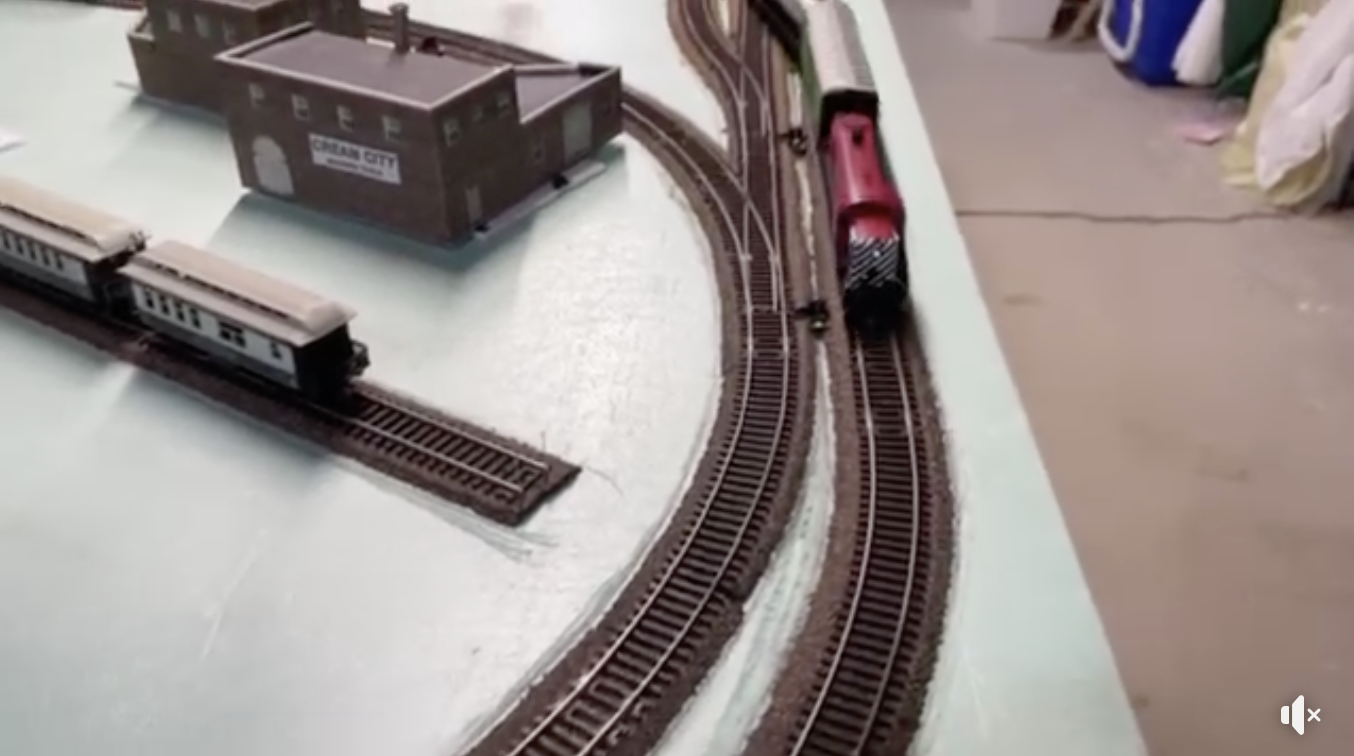 Initial Run on the layout The Blunami App was downloaded to my small iPhone. The iPhone was used to run a dead rail complete train on the layout. It went well, but I'll note some of the iPhone differences later. I put away most of the tools and the loop of track on the 2" foam and card table it was setting on. The photo of the loco with the top off the boxcar and short, first run, video information was posted to the Dead Rail Society and New Tracks Modeling Facebook pages. July 26, 2025 I started watching YouTube Blunami videos, by Soundtraxx, to figure out how to open the menus on the iOS version of the App. When viewing, "Getting Started with Blunami: Your Wireless Model Train Upgrade!", I noticed that he used the MULTI-TRAIN button on the Android device that he was using to demonstrate. That's what I had previously done on my Galaxy S7 phone, but when I chose the locomotive itself, my Samsung Galaxy S7 would crash the App. I watched part of "Blunami: Locomotive Naming" which used an iOS device and he opened the menu with the "wheel/gear" button, the settings menu. That is what I did yesterday, but it didn't seem right to me. I wanted to know how to mute the sound. I searched for "Soundtraxx Blunami how to mute locomotive sounds" There is a Mute button on the FCN screen. Opening the function menu in iOS is what I did not know how to do. I found the answer in "Blunami iOS App Overview".The button for the function’s menu is on the upper left of the screen and has what looks like a sound symbol on it. I replaced the funky push-pin truck connectors of the boxcar with 6-32 nuts, hex head bolts and a washer. The frame no longer "rocked" side to side. I rechecked the end of the frame with the Kadee #148 on it with the Kadee height gauge and found the coupler height to still be at the correct level. My fix did not totally fix the "rocking" problem. It had another problem after the fix. The hex head bolts, that I had used, would hit something in the middle of the track, like a pin head holding the track in place on my layout and derail the car. The 6-32 hex head bolts were replaced with 6-32 machine screws and it appears, after a lot of running, all through the layout, using the iPhone to control the train, that this has fixed the problem. I looked at the frame on my previously used Soo Line battery boxcar and noted that it had the same lousy push-pin setup. I was going to change it, but it appeared that I had super-glued one of the pins in. I didn't change it, yet! While running the train for 20 minutes, I noticed that when the forward/reverse button was clicked, the click was extremely loud. I could not find a way to adjust that click sound, since the sound actually came from the phone. I Googled and found that the volume of the click is adjusted by the volume level ON THE DEVICE ITSELF. July 27, 2025
I noted that George used the single loco button on the Android device and it did work. That confirmed that my OLD Galaxy S7 is the problem when running the Blunami App. The Apps that he's using on both tablets look slightly different from the ones on my iPhone and Android phone. He showed how to access the function menu on the iOS App, but not how to close it. The function menu can be left open and functions run from the menu. I want to add Dynamic Digital Exhaust. This video explains how to do it. I learned what Backup, Restore and Copy are used for. The two bottom screws, that go through the chassis and into the shell, were screwed in. It is a very nice model with very fine handrails. The side frames on the trucks are very fine and thin and look like they can be easily broken. Great care must be taken when handling the locomotive. According to Rio Grande Modeling and Historical Society, "The ALCO RS3 diesel-electric locomotive has a maximum speed of 65 miles per hour (mph). This speed is achieved with a specific gear ratio of 74:18". The answer was Google AI generated. That was the same maximum speed as my EMD GP15-1s. I had recently calculated the time it would take to travel the outer loop at a scale 65 mph. That calculation showed 25 seconds. I used a kitchen timer to time 25 seconds, with the Blunami App on the iPhone, to adjust the 3 Point Speed table so that at full throttle it took 25 seconds to complete the outer loop on the train table. The batteries were recharged before this was done, as they had not been recharged during the setup and several runs on the loop and train table. The charger showed the highest returned mAh as 137. That's not a lot out of a 600mAh battery. Using the 3 Point Speed Table did not set the locomotive speed to exactly 65 mph because it was pulling rolling stock and running on fresh batteries, which would run down during its run, but it would be close enough. The batteries were recharged after the maximum speed setting, even though very little capacity had been used; 27mAh. The original plan was to run down the battery until 12V showed at idle on the Blunami App. That would be about 3V per cell. I wanted a safety margin in the discharge, which should not be below 2.8V per cell for these types of batteries. The prototypical run time test was completed in 6 sessions in one day.
The total prototypical running time was 265 minutes, 5 seconds or 4 hours 25 minutes. It was taking too long to run the battery down to the planned 12V. I stopped when the idle voltage read 12.9V. The train, with its consist, had noticeably slowed down then. Shortly after the run, the resting voltages of the batteries were read with a multimeter set to volts. Batt. #5 3.264V, Batt. #6 3.264V, Batt. #7 3.268V, Batt. #8 3.265V for a resting voltage total of 13.061V, which was pretty close to the App's idle voltage of 12.9V and the batteries had already started to "bounce back" to a higher resting voltage. During the testing, at about 39 minutes into the first run, I noticed the boxcar/battery car leaning. I stopped that run and checked the screws used for the truck mounting to the frame. The screws were loose in the nuts. I didn't have any lock tight. I used Aleene's Tacky Glue to see if it would hold the screws, washer and nuts tightly. The Aleene's Tacky Glue seemed to have worked for now. The results absolutely amazed me. I had thought there would be 2 hours of prototypical run time before the batteries required recharging. The previously use LocoFiTM systems, using the same batteries, will need to be looked at again, since they were only getting 2 hours of run time. July 28, 2025
The average amp draw for 4.417 hours (4 hours 25 minutes) was calculated as 0.418Ah (highest returned mAh converted to amp hours (Ah) divided by 4.417 hours = 0.095A. That is only about one one-hundredth of an amp. I had previously calculated the amp draw for the two Walthers GP15-1s at about 0.30 amps or 30 hundredths of an amp. That number was from memory. I am positive that the data I collected yesterday was correct. I did spend close to four and a half hours, in total, running the train, with the RS-3, on the pattern that I use all of the time and doing shunting at each of the two terminuses of Northville and South Haven. I checked my prototypical run time data on my Website. I learned that the data showed the LocoFiTM prototypical run time indicated that the average amp draw for the GP15-1s was about 0.3A or 30 hundredths of an amp. That was a huge discrepancy between the two different systems and locomotives. The ALCO RS-3 uses the Soundtraxx Blunami decoder and is an Athearn brand, newer type diesel, with a newer 5 pole can type motor.
I did a test to Compare the two different types of control systems and model locomotives.
The route was from Northville to South Haven in my normal pattern. The GT boxcar was shunted to the right siding in South Haven and the C&O boxcar shunted to the left siding. Once the shunting was completed, the train was put back together. It was then run around the reversing loop to leave South Haven. Once, back on the outer loop, heading toward Northville, the throttle was moved the maximum speed for the run on the outer loop. The speed was held at about 1/2 throttle on the inside tracks and full speed on the outer loop. Each test was for 15 minutes, or 0.25 hours. Since I'd not run the GP15-1s in a long time, I wanted to verify that the maximum speed was similar to the maximum speed that I'd recently set on the RS-3. The RS-3 maximum speed was set so that it completed the outer loop of the layout in 25 seconds on fully charged batteries. The CSX Walthers' Trainline GP15-1, with the LocoFiTM decoder and a gondola battery car, was run around the outer loop with a consist of a 50' C&O box car, 50' Conrail boxcar, 40' GT boxcar and the C&O caboose. That was a similar load as to what was used for the maximum speed test for the RS-3. It took 25 seconds. That was the same as the RS-3. The GP15-1 and RS-3 were indeed speed matched. The 600mAh, 14500 (AA size) Henreepow LiFePO4 batteries, #1, #2, #3 and #4, were charged on the SkyRC MC3000 after the speed test run of the LocoFiTM equipped GP15-1 CSX locomotive with gondola battery car. The train was run for 15 minutes. The batteries were removed from the pack and charged on the MC3000 charger. The mAh returned for each battery showed; #1 62mAh, #2 63mAh, #3 63mAh and #4 62mAh. 63mAh (highest mAh returned) = 0.063A divided by 0.25 hours yields an average amp draw of 0.252A. The same batteries were fully charged on the SkyRC MC3000. The batteries were placed in the pack for the RS-3. The RS-3 completed the exact same run as the GP15-1, with the same shunting, for 15 minutes. After the run of the SoundTraxx Blunami equipped RS-3, the mAh returned for each battery showed; #1 27mAh, #2 27mAh, #3 27mAh and #4 27mAh. 27mAh (highest mAh returned) = 0.027Ah divided by 0.25 hours yields an average amp draw of 0.108A. This was an EXTREMELY SUCCESSFUL conversion of the Athearn RS-3 RTR and Soundtraxx Blunami to Dead Rail. It was not too difficult and very, very rewarding! I love it. I first attempted to use the Blunami App for Android on an old, Samsung Galaxy S7 Edge, and encountered a problem. I noted the problem through this article. The problem is repeated here: I rewatched the Soundtraxx video on YouTube; "Getting Started with Blunami: Your Wireless Model Train Upgrade!". VERY IMPORTANT NOTE ABOUT THE ABOVE, LINKED SOUNDTRAXX VIDEO! If George had produced this video using the bluish button with "Blunami v1.0" on it to connect to the decoder, I would have thought that I had a bad App or bad decoder! Luckily for me, he pressed the MULTI-TRAIN button.
I successfully opened the Android version of the Blunami App, on the Samsung Galaxy S7 Edge, by using the MULTI-TRAIN button. Later, after restarting the App, whenever I pressed the bluish button with Blunami v1.0 on it, the program crashed on my old Samsung Galaxy Edge S7. If the bluish button with Blunami v1.0 on it had been used during the video, I would have thought that I had a bad decoder or App because the program crashed every time I pushed that button. I probably never would have tried the MULTI-TRAIN button. Why the Android App, on my old Galaxy Edge S7, might be crashing is explained later. The good news is that the version of the Android App, that I have, works for me when the MULTI-TRAIN button is used. Even though I had gotten started, I opened the "Blunami_Quick_Start_Guide.pdf". Page 7 noted that I did NOT have to select MULTI-TRAIN, which I did, but that the single bluish button, with "Blunami v1.0" on it, should work. When I tried to do that, the App kept crashing, but when the "MULTI-TRAIN button" was used, the App would work and not crash. I looked into the problem of the Samsung Galaxy S7 Edge crashing when the "Single Locomotive Button" was chosen and not when the "MULTI-TRAIN" option was chosen. In the Blunami Quick Start Guide, page 5, it notes, "Note: The device should have a minimum score of "500" on the "single core" score at GeekBench. If the device is not in the list, download the "GeekBench 6" app and it will tell you the device's score." I went to the GeekBench site and found that the Samsung Galaxy S7 Edge used an ARMv8 1586 MHz (8 cores). The Single-Core Score was 412 and Multi-Core Score was 1178. "Interesting!" I cannot explain why my old Samsung Galaxy S7 Edge DOES appear to work with the App when the "MULTI-TRAIN button" is chosen, but it does! I had been looking for an affordable replacement for the Samsung Galaxy S7 Edge for a long time. Its battery is on its "last legs" and only lasts for a couple of hours at most, and it has the infamous vertical reddish pink line along the right edge of the screen. On September 8, 2025 I purchased a Straight Talk Samsung Galaxy A15 5G at Walmart for $39.88 plus 6% Michigan sales tax ($2.39). I had previously found that the A15 5G had a GeekBench Single-Core score of greater than 500. AI answer from Google
After a struggle to set up the Android phone, I was able to download the Blunami App for the Android from the Google Play Store. The Blunami App runs just fine on this inexpensive Android phone. I did NOT activate the phone for phone service through Straight Talk. I did not need another phone. The device only needed the ability to connect to the Internet through WiFi and download and run the app through Bluetooth, which this "phone" does just fine. I now have a "new" battery and a device that runs the Blunami App without a problem, or an annoying vertical line.
|