| |
Correction June 2003 Ampeer
The Eaglet 50 has 432 sq.in. of wing area, not 432 sq.ft. (duh)
Embracing Li-Poĺs
From: Bernard Cawley bernard.e.cawley@boeing.com
I am embracing that technology in my small flyers (which are proliferating!) and
looking to move up to larger power systems as charging and the cells become available. Schulze has just released an upgrade for
the isl-6 chargers that will allow charging lithium cells up to the maximum capability of the main output, so that means 5.6A on the
330d and 8+ A on the 636+. That will prepare me for Thunder Power packs
(www.flightenergy.com KM) or larger combinations of E-Tech
(www.aircraft-world.com/prod_datasheets/lipoly.htm KM)
or even Kokam cells (www.fmadirect.com/site/products.htm?cat=28 KM)
that will replace 10-cell packs of P3000s and then 14 cell packs after that. Perhaps by the end of the year we'll be there.
I'm charging with the Kokam 402 and a beta of the Bishop SC-2 right now. But
with updates into my Schulzes, I'll really be ready for the bigger packs (assuming I can afford to buy them!).
In the meantime, things like the Switchback will be LiPoly motivated much sooner.
It's odd that now a 10 minute flight seems like a short one.
I should have some information on an Astro 010 in a GWS gearbox running on 3S
1200 E-Techs after the Celebration of Silent Flight this weekend. That power system is going into the Dandy/Dandy Sport
tonight.
Return to "What's In This Issue?"
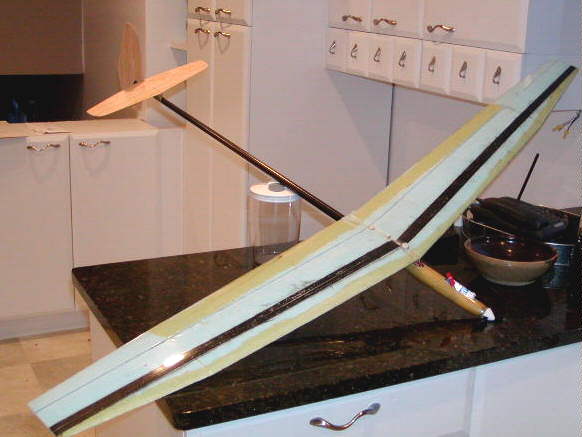
Aeronaut F-7-F Tigercat
From: Dan Parsons dapars@comcast.net
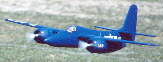
You read about Dan Parsonsĺ Tigercat in the June issue. I followed up with
a question about whether or not heĺd gotten his Li-Poĺs yet. KM
The only info I'm getting on the Li-Poly batteries is from the R/C Group Forum and
as I remember, Charlie said he was not going to use the 2200 but a new 2600. I just ordered a 3S4P using the 1950HV cells
from him and hope to have them in a couple weeks. I decided to go ahead and dip my little toe into the Li-Poly stew, figuring I
can learn only so much in just reading about them and need the hands-on experience. However, the more I read about them the
more I realize that they are a far different beast than the Nicads and the NiMH in their use and handling and can be quite
dangerous if not handled properly. (So can our NiCads and NiMH cells! KM) Itĺs gonna be interesting!!
Iĺve also sent you a picture of my Tigercat in a low pass.
Return to "What's In This Issue?"
Bob Meyerĺs Planes
From: Robert Comerford flyelectric@dodo.com.au
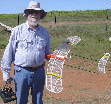
I have attached two photos of Bob Meyer's planes. The first (with Bob attached) is
what he calls his powered slope soarer. Note that it has a swept back wing, all flying tail, weight of 460 g, 400/35 motor, 7
KR600 cells, gunther prop, and homemade ESC. The covering is clear document covering and the model flies well, even in a
stiff breeze.
The second is a 10-cell model. It is also his own design. It uses a Keller 50/6, 10
1400SCR, 10x6 prop, weighs 1380 g, use a homemade ESC, and the covering is more document covering with some extravagant
use of blue solar film - I think. This is a nice 10-cell sport model for everyday flying.
I hope to bring you more of Bobĺs models over time. Bob is probably Australia's
most prolific builder of electric model aircraft. I suspect his output would be hard to beat anywhere in the world. Bob has been
flying electric models for many years and designs and builds an amazing array of planes. He is pictured here at a recent
inter-club meet at Armidale in northern NSW. Their new club field is located on the council sewerage recycling farm and was
not as odoriferous as it sounds.
 Return to "What's In This Issue?"
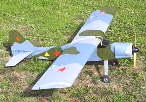
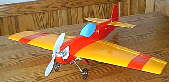
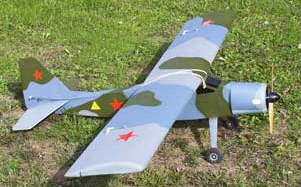
JK Aerotech "Big T"
From: Glenn Campbell gcampbel@arczip.com

I finally got my "Big T" in the air. As you can see, it is not your usual
T. I put 2 X 18" ailerons on per Bernard Cawley and changed the motor to a Trinity 19 turn Quartz with a Great Planes
gearbox. A10-tooth pinion gives a 4.6:1 gear ratio. This spins a Master Airscrew 12x8 wood E-prop. With 10 cells, it the
prop spins it at 6300 RPM and pulls 29 amps. I wanted a radial look and found a storage container the right size at Krogerĺs.
I sawed it off and screwed it on. It covers the motor, but gives good cooling. The paint scheme and homemade decals are
pure off the wall. It just looked right to me. It reminded me of some Russian recon planes Iĺd seen.
The first flight was on a 65-degree sunny morning with a 5 mph wind at low level,
but higher winds up in the air. The T tracked straight and was up and away before I expected. It was climbing way too fast. I
had to juggle the elevator and throttle to get it to settle down. I was proposing all over the place. Even after backing way off
the throttle, I had to give a good eight clicks of down to keep it in level flight. I think the CG is too far back, and I need to
move the battery forward. Thereĺs plenty of room for that.
Other than wanting to climb all the time, it is a docile handling plane. With aileron
throws of 3/4" up and 3/8" down, I was a little apprehensive about over controlling, but it was just perfect.
The Trinity motor set up has plenty of power and was a lot faster than expected. I
havenĺt done any real aerobatics yet. Iĺm still getting used to the plane and tweaking it. I donĺt have a high capacity battery
pack yet and the stock 1400 mAh gives about 5 minute flights. The T gives plenty of warning when the battery is getting low
and I land into the wind, floating it to a very slow, almost a stopped, landing.
Wow, I was impressed. It flies pretty fast and yet can slow to a walk with
excellent control. Iĺve really enjoyed building this excellent kit and look forward to many hours of flying.
You can visit my Web page for more planes and images:
users.arczip.com/gcampbel
 Return to "What's In This Issue?"
Re: Li-Poly
From: Mike Banyai mikebanyai@chartermi.net
I missed your request for information about Li-Poly cells on the eflight list. I would
have advised you to consider 1200 E-Tech in a 3S3P pack that would get you 18-24 amps out at 10 to 11 volts at a pack weight
of only 7.5 oz. I bet your ship will be a different bird if you loose more then half a pound and only double your flight times.
I ran your ship through MotoCalc and got very different numbers for the ones you
gave. It says that an Astro Flight 035 7T with 2.38 gear on 10 cell of 1700SCR with a 10x6 MA electric should be pulling more
then 34 amps. Am I missing something? What airframe weight, area, span are you using?
(IĹm using a 2.82:1 ratio and a standard, not electric Master Airscrew
wood prop. Static amp draw is in the 28 amp range. Flying weight is 58 ounces and the wing area is 488 sq.in. KM)
Just as it was necessary to make some adjustments when using NiMH cell, there
are some tricks to Lithium. What one really wants is watts. There are two parts to the watts equation. Sometimes it is better to
boost the voltage and keep the amps a bit lower. With a plane like yours, that is already setup, there are not as many possibilities
as one that is being setup. Sometimes a gear change and prop change can get better results.
Kokam was the first to market Li-Poly cells and on Ezone, the president of the
company JJ Hong even took part in the discussion about these cells, which was very interesting. FMA is the US distributor for
Kokam. These were the first generation which went to a 3C discharge. Next up was the E-Tech as put forth by Dave at Aircraft
World. A number of places in the States also sell these now. These tolerate a 5C draw to almost 100% of capacity. This falls off
some as the discharge rate goes up. Ballpark for the E-Tech 1200 cell is 1.16 Ah at 6 amps, 1.1 Ah (92%) at 8 amps
and 0.97 Ah (81%) at 10 amps. This can be seen on the discharge curve posted at the Bishop site. Note in particular that the discharge curve is like most
other batteries in that at these currents the voltage does definitely drop off over time. Thunder Power is the great unknown.
(large deletion of Mikeĺs speculation about TP here)
Kokam and E-Tech have products you can buy and have published discharge
curves you can believe.
Here is the HD600 curve for the new Kokam
http://www.rcgroups.com/forums/showthread.php?s=&threadid=94077&perpage=15&pagenumber=16
On the Bishop site you can see the graph here
www.b-p-p.com/i/etec1200tests.jpg for E-Tech1200. Because of these
curves, and because Thunder has not published curves, I do not see the flat curves you mentioned on page five of the May issue.
I also think that the paragraph regarding cell drift is turning out to be a red herring.
I can't put my finger on it but there was a post by a fellow who checked a pretty big pack after 20 or thirty charge cycles and
found that the variation in cell voltage was about the limit of his detection, ie. 0.1v. If I can dig up this line of discussion I will send
it to you.
The latest, high discharge cells are listed on the FMA site as being intended for
discharge rates of 5-10C, pretty much in line with the E-Tech. The really big break will be the 20C cells that apparently are
designed but not ramped up in production.
Check out the following graph by Stev Neu, no slouch at testing. It shows that the
E-Tech are very strong at 5C or six amps drawing off of a 1200
cell. It gives at least 90% capacity at 6 amps.
www.rcgroups.com/forums/showthread.php?s=&postid=863426#post863426
Attached is a picture of a plane I hope to fly Wed. The weather is just starting to
break up here. It has a sixty inch span with Mark Drala airfoil, basically itĺs a SuperGee, with a Razor 400 brushless and a 2S1P
E-Tech 1200 pack that draws 8-9 amp using a 4.7x2.3 Cam folding prop. All up weight is 14.5 oz.
 Return to "What's In This Issue?"
Hatches, Newbies & Li-Poĺs
From: Chispas chispas@sapo.pt
I have been flying my sailplanes and the Skycat while waiting for my brushless
motor.
I have been using an interesting idea for closing hatches and canopies that came
from one of the threads of the Ezone. Iĺve been using two little magnets of neodymium, from slot-cars, to maintain the canopy of
the Skycat closed. It stays on well, even during aerobatics, and is very easy to open for changing batteries. I only have to grab
and slide it a little. Before that, the canopy was secured with tape as it there wasnĺt space to use Velcro, and it didnĺt close very
well.
I've been reading your articles about planes for newbies and agree totally with
you. Some manufacturers of electric airplanes seem to have the habit of putting
the less expensive and less powerful power system in them. Sometimes we have to find that out by trying them and then
changing them. For at least three years I have buying my planes without a power system. It can be a pricier purchase, but
cheaper in the long run.
Li-Poly batteries seem to be capable of starting a revolution in e-flight, but they
have to lower their price. For now I can fly ten plus minutes of aerobatic flights with my 3000HV cells in the Skycat without
purchasing any more equipment, and I get some rest while peaking the next pack. Time will tell
where we all go.
Apart from that, but following the same pattern: Why buy a brushless motor if you
have an brushed motor doing the same work and cheaper? From 6 to 8 cells 3000HV cells and for 10x8 to 12x8 props I still use
my beloved Kyosho Mad Science series motors. I donĺt see a brushless motor doing the same amount of work, RPM versus
Amp draw for the same amount of cash, and I already have the SCR's to work with these motors. My gearboxes allow me to
use various ratios to optimize the motor to the prop. At least for me, the brushed motors still work.
On other applications be pragmatic: if you cant beat them, join them.
Return to "What's In This Issue?"
Thoughts on Li-Po Cells
From: Robert Comerford flyelectric@dodo.com.au
(This is the email that I received from Bob that woke me up to the error in
the May Ampeer. KM)
In the May 2003 issue of the Ampeer, you wrote "when the cells are
put in SERIES the total amp draw can be safely increased". Was this a typo or did they say that? (This was
immediately corrected in the online versions with an update page sent in the June issue to those who receive the paper
version. It was an error. KM) If they did it doesn't make sense.
I am also confused with Jason Markles's statement that the Internal resistance is
lower with Li-Po cells than Nicad cells. I don't have any in front of me to confirm the assumption but the fact that the current
handling of the Li-Po cells is only in the order of 2-4C makes me suspicious. A 1200 mAh SCR Nicad cell from Sanyo will
deliver 30-40 amps and more for many cycles. The World Aircraft claim of 5C for 1200 mAh cells sustained is only 6 amps
current handling ability suggesting a high internal resistance to me. The shallow voltage curve over discharge sounds good, but
could it be that the internal resistance is simply remaining more constant than a Nicad cell, not that it is lower to start with?
It will be interesting to see how the problem of "cell drift" will affect the parallel
operation of these cells. It sounds to me like they are being operated at close to their limits with some (weaker ?) cells chemistry
being affected causing perhaps an increase in the internal resistance and thus lowering the output voltage. As it appears these
cells have a critical low cut-off voltage this has implications for the level of auto cut-off for ESCs.
If we can get value for money out of these cells, it all sounds exciting. With such a
possible increase in capacity to weight I can see some people going back to dedicated packs and charging jacks on the side of the
fuselage.
It sounds like Norm is having fun with these new cells. Iĺd like to suggest another
way of using cells to make varying pack sizes. The cells can be left separate with their connectors (if you are satisfied with
them). The plane's wiring can have the matching connector(s) to series and/or parallel the cells. There would be no special
bridges or anything. The cells could be plugged in until there are no spare connectors and the circuit is complete and the plane is
ready to go. We did this years back with Nicad cells before inverter chargers and Sermos/Anderson connectors were the norm
around here. The batteries had the females and the chargers and plane wiring had the males. Obviously neither method is as
good as soldered packs with as few connectors as possible, but it does have the advantages of flexibility (as Norm suggests) with
such an expensive investment as these battery packs. I hope you get some good feedback regarding the sport use of these
cells.
Return to "What's In This Issue?"
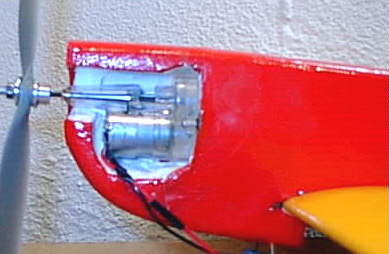
Sanyo's HR1950FAUP & KAN 950
From: Jim Halbert halcoe@inter-linc.net
There are some new, remarkable batteries out. I just built a new Zagi powered by a
Mega brushless ACN 16/15/4 with a APC 7X5 electric prop and Castle Creationsĺ Phoenix controller. The batteries are what
make this thing workable. They are the new NiMH Sanyo HR1950FAUP. I have a 7-cell pack. They are light weight, high
capacity 1950 mAh with a low voltage sag. I draw 22 amps peak with no more voltage drop then with the best Nicads. Flight
times exceed 10 minutes. The plane is fully aerobatic. Itĺs a remarkable plane than also makes a good trainer with the stock 400.
It is crash and idiot proof. There are a lot of knock-offs but there is nothing like a Zagi!
There is also a much improved replacement for Sanyo 500AR or 600AE cells.
They are the new "KAN 950". They are about the same weight but with twice the run time and much less voltage
drop. These are good to about 13 amps, I've found. I junked all my 500 AR cells and replaced them with the KAN cells. What a
difference! A caution however - I burnt out an expensive brushless when I switched batteries. The increased V/A burnt out the
motor with the same number of cells. I had to down size the prop to maintain the same amp draw on the replacement motor.
I got the batteries from Robotic Power Solutions,
www.battlepack.com. They have free zapping if wanted.
I had the HR cells zapped.
Return to "What's In This Issue?"
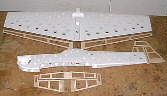
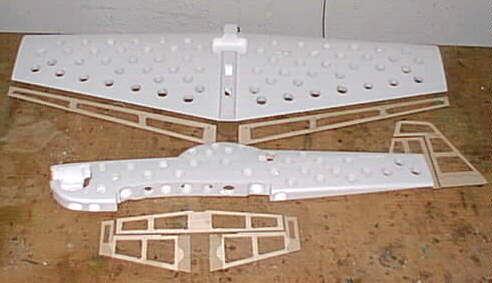
Building and Flying the Vertical RC Cap 232
By Ken Myers - May 2003
Wing Area: 282 sq.in. (mfg.)
Weight: 16.2oz. - 1 lb. .2 oz. 460g
Wing Loading: 8.27 oz./sq.ft.
Wing Span: 32 in. (mfg.)
Promax 300 Geared Motor #ACC321 370 motor, 5.6:1
Wt. 2.6 oz. 75g
Kv = 909, Io = 0.8, Rm = 0.307
8 Sanyo 600AE (0.63 oz.) = 5.4 oz. 155g (w/interconnects, leads & connectors)
Motor + reducer % of total = 16%
Battery weight % of total = 33.3%
Total motor + battery = 49.3%
Completed & covered airframe weight = 5.4 oz. 155g
Onboard R/C weight: 2.4 oz. 68g
Rx: FMAdirect Extreme 5
1 Hitec: HS-60
2 MPI MX-50HP
ESC: Castle Creationĺs Pixie-20P
Note the following mathematical estimations are based on the voltage near
the beginning of the pack discharge and apply to static testing conditions. Amp draw will decrease in the air and as the
pack discharges through the flight, but since most of us tach and test on the ground, these figures can be used for comparison.
Using 9x6 SF prop:
Watts in 102 (9.6*1.33*8) Watt/lb. 100.7
Watts to motor 86
Watts to prop 53.9 Watt/lb. 53.3
RPM 5,550
Ormeĺs Rule: 6 - 8 cells
Kenĺs Modified Ormeĺs Rule: 6 - 9 cells
Flight Factor: 1.26
Diameter Factor w/ 9x6SF - 3.93
Pitch Factor w/ 9x6 - 0.67
"Speed" to RPM Factor w/ 9x6SF - 3.13
It should be noted that I made many changes to this plane to fit my personal
requirements. None of these changes improved upon the basic design or any type of "flaw" in this
kit. By making these changes, I nearly doubled the building time of the kit and added to the AUW (all-up-weight). It took me
about 20 hours to complete my version, while I would expect that the average building time, with the recommended equipment on
hand, to be about 10 hours or less.
I highly recommend that you build the plane stock with the recommended
components. If you do, the plane will go together very quickly and be an aerobatic park flyer for the intermediate
and expert pilot. Do not attempt to fly this plane until you have several hours on low-wing aerobatic type models.
There is absolutely nothing wrong with the way it flies. It flies great with no bad habits whatsoever. It is close-coupled with
plenty of surface throws. This is NOT a beginnerĺs plane. That being said, this is an easy to assemble, fun to fly,
"park" aerobatic model.
I had the kit on the building schedule for this year, so while visiting the Toledo
Exposition, I purchased a Promax 300 Geared Motor #ACC321 370 motor, 5.6:1 and 12x8 prop combination from Maxx
Products. The main reason for the purchase was because of the way the gearbox is configured. The motor is some kind of a
Speed 300 with a "reverse facing gearbox", so that the motor is actually running in the proper direction for timing and
brush angle. I spent some time testing the motor for the various motor constants. This may have contributed to the early failure
of this motor. More on that later.
While motor testing, I read through the original 4-page typed instructions several
times. The instructions have since been replaced with a well written manual that includes helpful photographs. I also noted, while
looking over the parts, that the foam fuselage and wing seemed to have, in my opinion, a lot of "excess material".
Since I wanted to "cover" the model to match my fleet, I decided that Iĺd remove what I considered to be the excess
material.
I visited the Vertical RC site
(www.verticalrc.com) to see if I could learn anything from the photos and other
information on the site. I also noted that Vertical RC had been experimenting with brushless systems and Li-Po cells. I clicked
on the link between the two photos of the Cap 232 and found the info on the brushless system and Li-Po cells. Most interesting
on this page was the way that the plane had been lightened, much the same as I was thinking about. It also gave a bit of a clue
as to which servos went where. A push rod system has replaced the pull-pull system found in the original version of the kit. Tim,
of Vertical RC, provided me with the push rods and guides so that I could use them on this plane. He also provided the new
manual which was a big help!
I had purchased a seven-cell Sanyo 600AE pack and two extra cells from Joeĺs
Hobbies in Farmington, as I wasnĺt sure whether Iĺd be using an 8-cell or 9-cell pack. I had to reshape the "well" to
fit a 600AE pack. It also meant that I had to look into the possibility of using only eight cells, which is what I ended up doing.
Mathematical, the 8-cell NiCad pack should be delivering over 400 RPM more
than a 9-cell NiMH pack. Not having a 9-cell NiMH pack, I couldnĺt verify it, but this has held true in other applications. Since I
donĺt like NiMH cells because they take too long to charge at the field and have some fairly odd characteristics, I decided to
configure my pack as an 8-cell 600AE NiCad pack. With that pack, the provided battery cover was not going to fit, so I just left
it off.
When building my pack, I found the cells in the 7-cell pack and the single cells that
I had purchased to be in about the same state of charge, so I just separated the 7-cell pack and inserted the eighth cell to make a
4x4 pack configuration. The pack was then put onto a slow charge of 1/10C and construction of the plane started.
I weighed all the components of the kit and found that they weighed 145g or 5.2
oz. The wing with the ailerons weighed 70g or 2.4 oz. before the battery "well" was enlarged for my pack and
lightening holes were put into the wing. It should be noted that I was not trying to lighten the plane overall. I was only trying to
compensate for my covering. The wing and ailerons weighed 60g or 2.2 oz. after "holing" the wing and cutting holes
in the ailerons.
The fuselage needed to have the motor mount modified because I chose a motor
that the designer had not allowed for. The fuselage weight before the motor mount and ôholingö was 35g or 1.2 oz. After
"holing" and with the original lite-ply motor mount attached, the weight was 30g or 1 oz.
The "holed" weight of the wing and fuselage was 85g or 3 ounces. Why the
difference? My scale only weighs to the closest 5g.
The laser-cut lite-ply landing gear sandwich was easily assembled with the landing
gear wire.
I assembled the rudder and elevator laser-cut parts with CA. Since I did not have
the Pro version, I cut out the openings in the elevator and rudder to lighten them. If you are going to cover the tail surfaces, get
the Pro version! I forgot to weigh the tail components before "holing" them, but the rudder, vertical stab, horizontal
stab and elevator weighed 5g (0.2 oz.) or less before covering.
It must be noted that I gave up ease of construction and paid a weight penalty by
covering with Econocote/Towercote. The designerĺs objectives can easily be met by just following the directions. I also gave
up some performance by using a Hitec S-60, which I had on hand, instead of another MPI MX-50HP Micro Pro Servo, which I
highly recommend.
The total weight of the airframe components before covering was 95g or 3.4 oz.
The total covered airframe (minus landing gear & tail skid) weighed 140g or 5 oz. Thatĺs a weight gain of 45g or 1.6 oz.
With the "holing" of the fuselage, wing and tail surfaces, and not weighing the tail surfaces before holing, it seems
that covering the whole plane has added just over an ounce in weight.
During the covering, the horizontal stab and elevator were affixed to the fuselage.
The wing, tail skid, vertical stab and rudder and landing gear plate with the landing gear were epoxied to the fuselage. The
wheels were added. The completed airframe weighed 155g or 5.4 ounces.
The radio installation began by installing the elevator servo, push-rod and horn.
Next came the rudder, ailerons and then the motor with ESC. Two small 1/8" ply rectangles were recessed into the motor
mount area and epoxied in for the screws to hold the gearbox in. The back-plate of the gearbox was not used. The routing tubes
for the rudder and elevator pushrods were hot glued onto plane. I chose to route my antenna out the back using the same type of
tube that the pushrods run through. Finally the battery was Velcroed into position and the CG. checked.
The RTFW is 460g or 16.2 oz. RTF.
 Flight Report
April 27, 2003: The first flights were during the EFO meeting at the Midwest R/C Society field. It was a beautiful,
but quite windy day.
Flight 1: Oops, control set up was very sensitive and the CG was possibly back just a little too far. Upon hitting the
ground, the nose broke and had to be epoxied. The shaft was slightly bent, but straightened as good as possible at the field.
Flight 2: The second flight had Keith Shaw at the controls. The CAP came out of the knobby grass and into the air
with about a 10 mph wind blowing. Keith trimmed it out and noted that I did have the surface throws set up too sensitive for
sport flying and that the CG was back a little too far. The wind was blowing a little too hard for me to try it, and I wanted to
make the changes recommended by Keith, so I packed it up.
At home I hollowed out the battery compartment so that the 8-cell 600AE pack
could be moved forward by the diameter of a row of cells. The elevator and aileron throws were reduced a lot.
May 4: Flight 3: It was a cool, very early Sunday morning. I went to the local park. There was no wind. I checked
the amp draw with the APC 10x7 SF prop and was amazed to find over 12 amps, while the RPM was just over 4000. I was not
pleased, and donĺt know why I hadnĺt checked it before.
Since it was prefect weather-wise and people-wise, I decided to fly anyway.
The plane easily rose from the dirt infield of a baseball diamond. Once in the air I
need to add quite a bit of left aileron and down elevator. I flew it around gently for awhile, getting used to the control inputs. As
the flight continued, I flew at various speeds and tried the "normal" maneuvers. I also shut off the power on several
approaches to the landing area to see what would happen with the power off.
Without timing, Iĺd say the flight lasted over 5 minutes, which surprised me. The
landing was uneventful. Thatĺs my favorite kind.
Flight 4: Now that the plane was trimmed out, I tried a few more aggressive maneuvers. Iĺd say that this flight was
more in the 4 minute range. It was definitely shorter than the first flight of the morning. The flight went well, and I noted some
changes I wanted to make.
At home, I adjusted the control surfaces on the ailerons and elevator so that I
could trim them to neutral on the transmitter. I also readjusted the motor thrust, as I believed that there might have been some
left thrust built in from the nose readjustment on the first flight.
May 5: Surprise, surprise, surprise! I straightened the motor in the motor mount by shimming it with a small
washer. I removed the prop to try and straighten the shaft better, and looked closely at the prop I had on the plane.
I charged up the 8-cell 600AE battery to test the prop that I had really meant to fly
on this plane, the APC 9x.4.7 SF. The test with the 9x4.7 SF showed 7.6 amps and 5,800 RPM. I was
"underwhelmed". A 10x4.7 SF measured 10.2 amps and 4,880 RPM. Both of the measurements were taken with a
hot, freshly charged pack right after removing the 8-cell 600AE pack from the charger. I decided to fly the 10x4.7 SF.
An interesting thing happened when I tried to mount the APC 10x4.7 SF. The
prop adapter would not stay on the shaft. On closer inspection, I found that the 10x4.7 SF was narrower at the hub than all the
other props Iĺd used on that adapter and it would not "tighten up" on the shaft. I added another washer between the
one supplied with the adapter and the prop and it tightened up just fine.
Even though rain was eminent, I decided to find a place to fly the CAP near my
home. I returned in hour with the rain ready to start and with the realization that baseball/softball and soccer have taken over all
the open areas in "parks" on weekdays. So much for park flying in the evening!
May 10: The thundershowers ended early and I headed over to the park, trying to beat the Saturday morning
baseball players. Winds were a little high for this light-weight plane, but I wanted to give it a try. I got in two flights with the
10x4.7 SF prop. They werenĺt really what I was looking for. The vertical was not as good as Iĺd hoped for. Both flights
averaged 5.25 minutes, which gave an average amp draw of about 6.86 amps.
I continued to work on getting the plane trimmed to fly with neutral trim on the
transmitter. Using the 10x4.7 SF the plane was slower and easier to fly in a more confined space, but I preferred the flights
using the 10x7 SF prop. With the average amp draw I got for the 10x4.7 SF, I figured that maybe the 10x7 SF was not too
much for this power system.
May 17: The EFO met at the Midwest field. The wind was quite high, but with the 10x7 SF, the first flight was
really good. On the second flight, disaster. Shortly after takeoff, the motor stopped. Examination at the field did not reveal the
problem.
At home, an autopsy was performed on the "dead" motor. I found that
the positive brush spring/brush holder had broken off. Most likely this was due to "over amping" the motor. I noted
that this Mabuchi has an angle on the brush spring/brush holder, and even resetting the timing will still leave the
"wrong" angle on the brushes, so it is best run the way it is.
I ordered a new motor/gearbox unit, extra motor, and extra gearbox shaft with
gear from Maxx Products on Monday, and they arrived on Wednesday. At the same time, I also ordered some smaller diameter
APC SF props from E Cubed R/C, and they arrived on Thursday.
The motor was "run in" and ready to go Friday afternoon. With a 9x6
SF, the amp draw was about 9.5 amps and the RPM 5,500 with the battery hot off the charger.
May 23: Two flights at the park before the rain started. Light winds. It flew better than with any other prop
Iĺd tried.
May 24: Up early to beat the rain and people to the park. Wind was moderate for this type plane. I flew three
timed flights. All three flights lasted about 8.25 minutes. That gave an average amp draw of about 4.36 amps for the flight
based on 600 mAh, which is probably less, so therefore the average amp draw is probably less. I held nothing back. I just flew
my normal aerobatics with throttle management.
I had six more very successful flights in the afternoon. This is turning into my
favorite plane very quickly.
May 26: 4 more good flights in the morning.
Recommendations:
You need to be an intermediate to expert pilot to fly this plane. It is NOT difficult
to fly, but you must fly it at all times. Iĺve found absolutely no bad habits with it, but it requires constant attention and
"staying ahead" of the plane with your thinking. This plane would be great for someone whoĺs flown mostly glow
planes and wants to "dabble" in electrics. It is not too expensive, including all the gear. It can be flown
aggressively. It flies much better than an Zagi, which is a popular choice for glow-powered fliers to try their hand in electric
power.
Follow Vertical RCĺs recommendations for equipment, and purchase what you can
from them. It will save you time, and youĺll have this plane in the air in no time.
If you are planning to fly this plane indoors, or at a typical R/C flying field, use a
reliable receiver for that type of environment, where many planes will be flying at one time. If you are not sure what I mean by
this statement, please contact me and Iĺll be happy to tell you which receivers NOT to buy!
Other tools I used not listed in the manual:
7/16 o.d. Brass tube, 5/16 o.d. Brass tube, Dremel w/sanding drum and cutting tool, Gas stove, Midwest Sanding Blocks, 1/16"
drill bit & electric drill, Radio Shack Wire Stripper, Wire cutters, Z-bend tool, Anderson Power Products crimper: #1351G1, Iron-on covering
iron & heat gun, 40 watt soldering iron w/Charlie White T tip & solder, pelouze Model PE10 digital scale, ruler, metal yardstick, 90-degree metal
square, single-edge razor blades, masking tape, small plain-end screw driver, fine-tip black marker, small Phillips screwdriver, spring-type
clothes pins for clamps, pencil, Anderson Powerpoles, Velcro
Sources:
Promax 300 Geared Motor #ACC321 370 motor, 5.6:1 and 12x8 prop and MPI MX-50HP Micro Pro Servos -
www.maxxprod.com/mpi/mpi-10a.html
Cap 232 kit - Vertical RC: www.verticalrc.com
Castle Creationĺs Pixie-20P: www.castlecreations.com
E Cubed R/C: www.azarr.com
More Info Regarding What Iĺve Learned in the next issue.
Return to "What's In This Issue?"
To Reach Ken Myers, you can land mail to the address at the top of the page. My E-mail
address is:
KMyersEFO@aol.com
EFO WEBsite: http://members.aol.com/KMyersEFO/
|
|


